It's been a little while since I have found time to share with you in this bloggy space but I couldn't resist making time to showyou a couple of little DIY upcycling projects we finished over the weekend.
Life has been pretty hectic this month as I started advertising and taking new enrolments for my home daycare business. I'm sure I will find my rhythm soon and be back on top of blogging and just plain parenting….but if I have to wander away again from here at times you will know why!
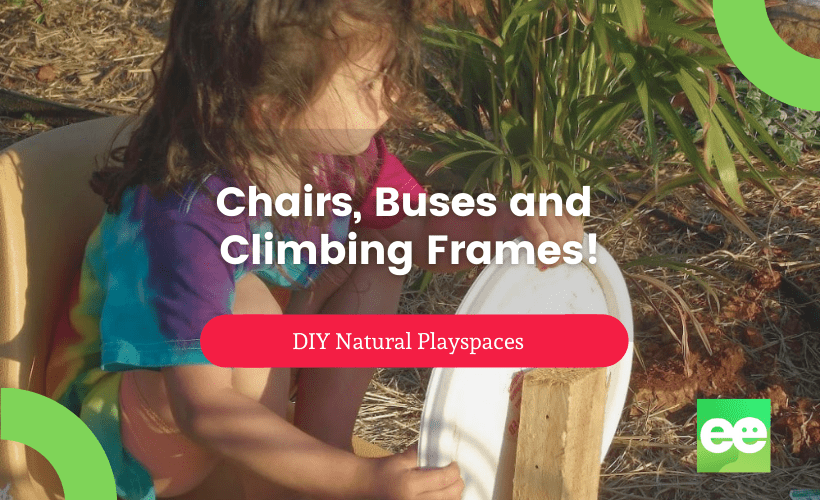
It was nice to spend the weekend outdoors in glorious Spring sunshine and under brilliant blue skies…and a great opportunity to get into a few projects with the old plastic schoolchairs I had managed to pick up very cheaply from our local rubbish revolve centre.

I remember these chairs well…especially sticking to them in Summer! For only a few bucks each I came home with quite a few……
I got the toddler twosome out the back scrubbing them clean with me. Such busy work and I could tell they felt very important and helpful!

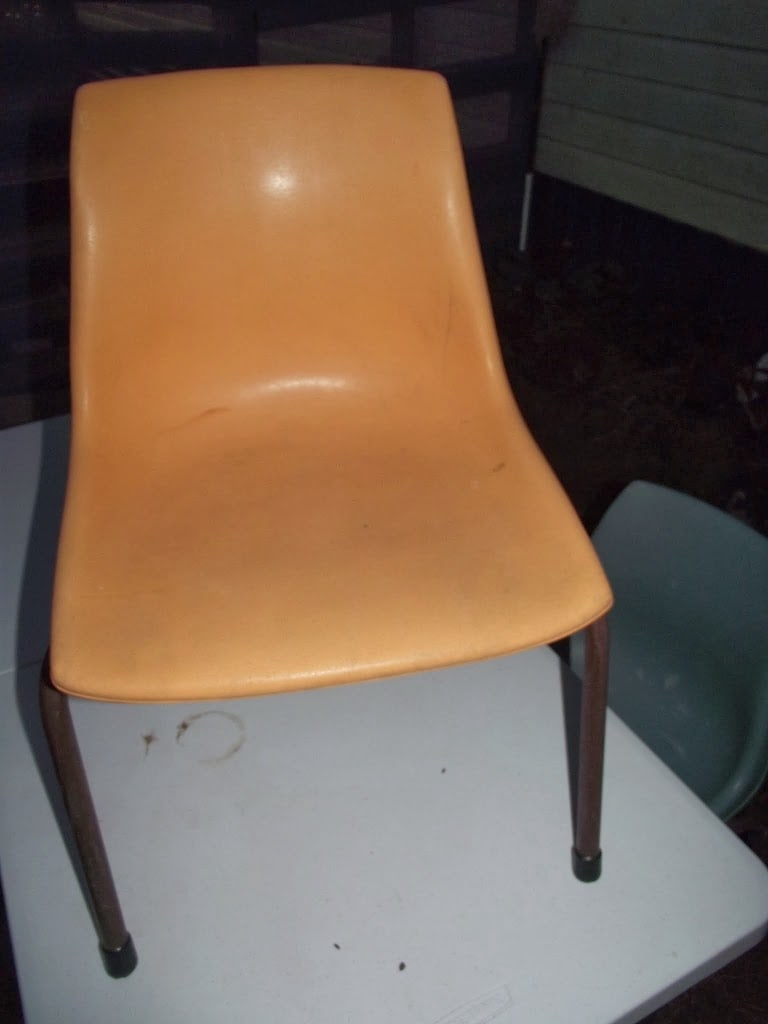
Then came the “simple” task of removing a few of the chairs from their frames. I thought it would be a quick job with the drill but we soon realised that they had put special security screws in and we had to use a few *ahem* persuasive methods to part those two!
When we had the seats all separated from the frames his patient self screwed them onto one of our old fence posts…these things are heavy but I love the look of them so i keep trying to find ways to use them.
They are pretty heavy but easy enough to move around with two people.

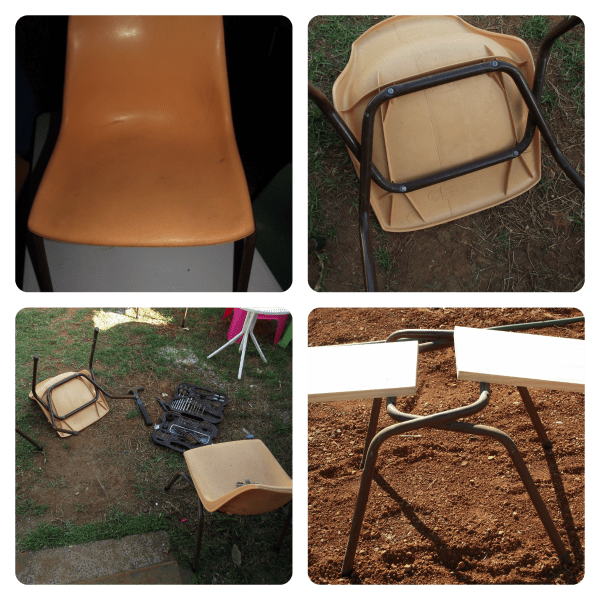
A little steering wheel (large round plastic lid) was added and then it was all aboard!
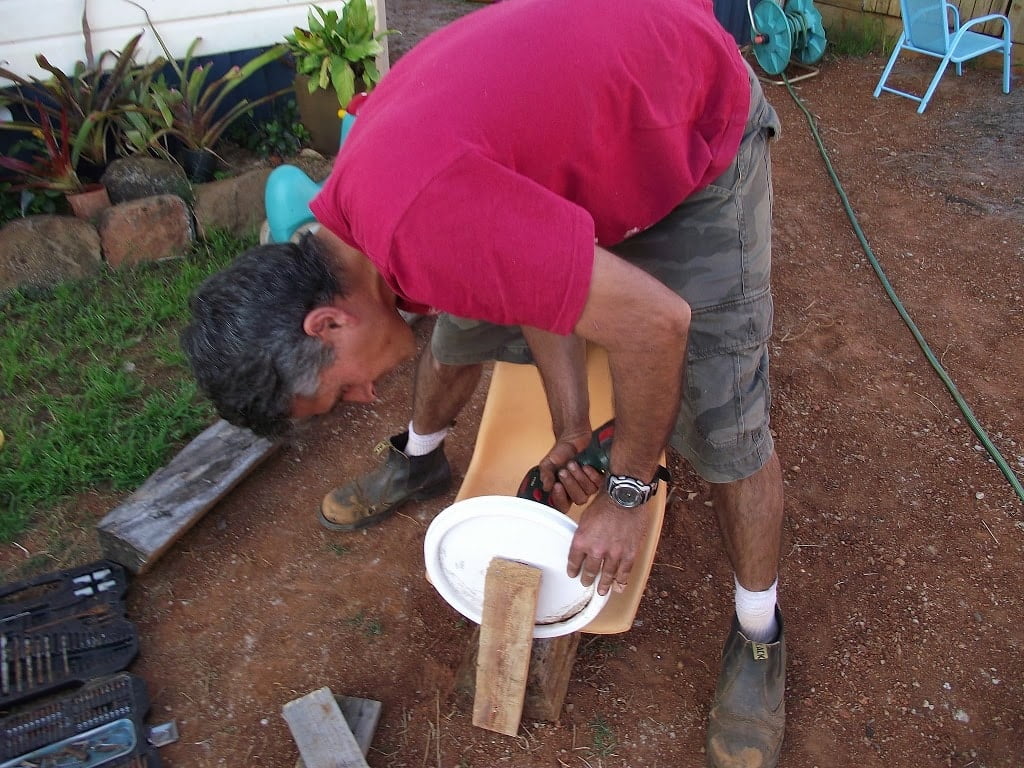
Ruby was not giving up the coveted position of driver without a fight it seemed……

The girls love making buses and trains inside with chairs and other bits and pieces so I thought this might be a fun way for them to bring the game outside. Very simple to put together with a drill and some screws and it keeps them busy for ages!!

I put it over beside our quarry and i think it suits this spot rather well……………

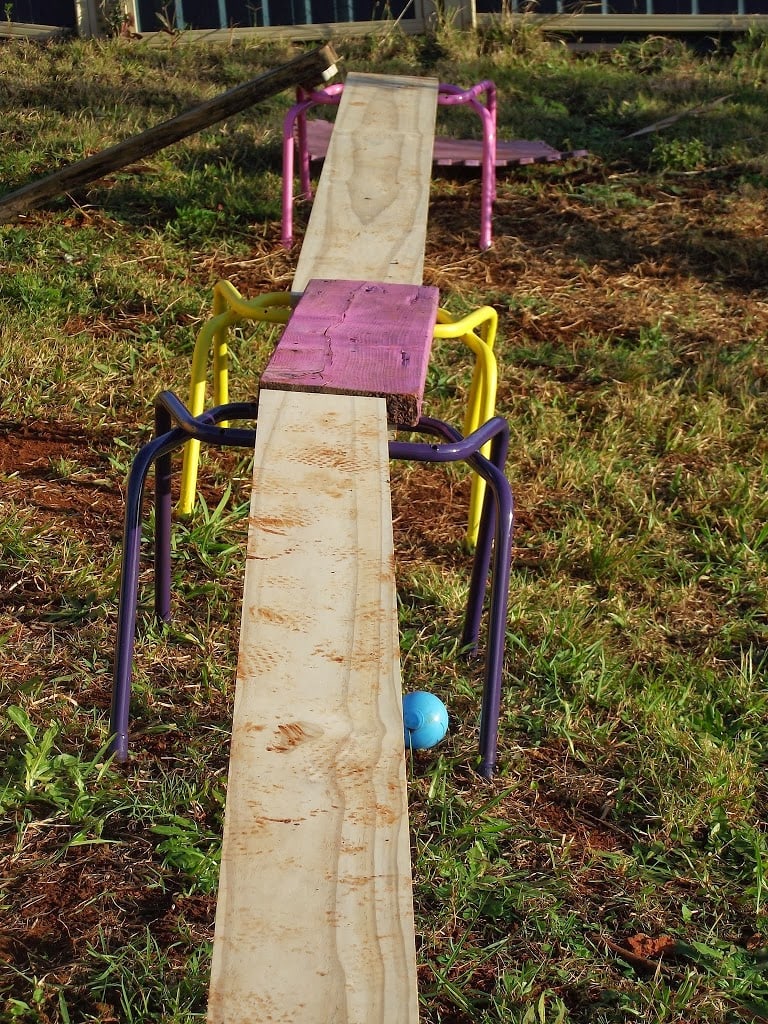
But now I had 4 leftover metal frames from the chair seats so I decided to turn them into balancing and climbing trestles for family day care.
This sort of equipment costs a fortune in the educational catalogues and are therefore beyond my reach but I have been wanting to extend upon the girls current interest in climbing and balancing so I came up with this diy solution.
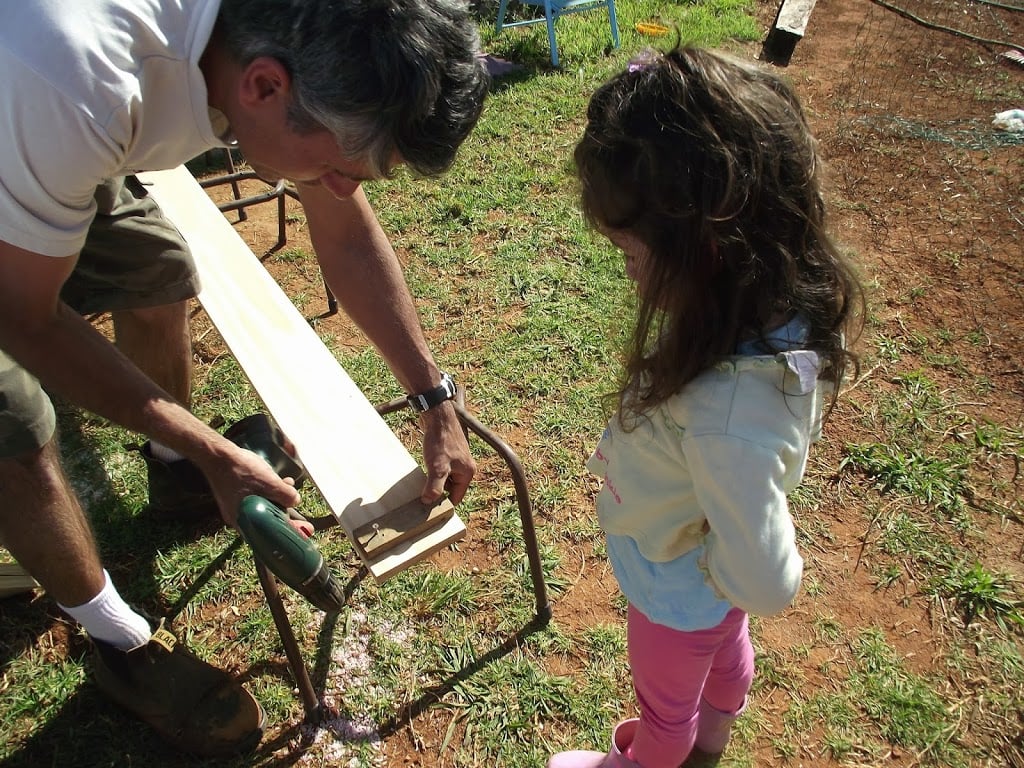
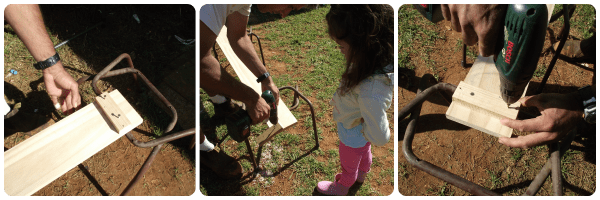
We purchased a few pine boards and his patient self added some easy little cleats tot he bottom of each end with scrap wood. His little apprentice watched him the whole time!
We then raided the garage for some old spray paint cans and began transforming the frames into something bright and fun!
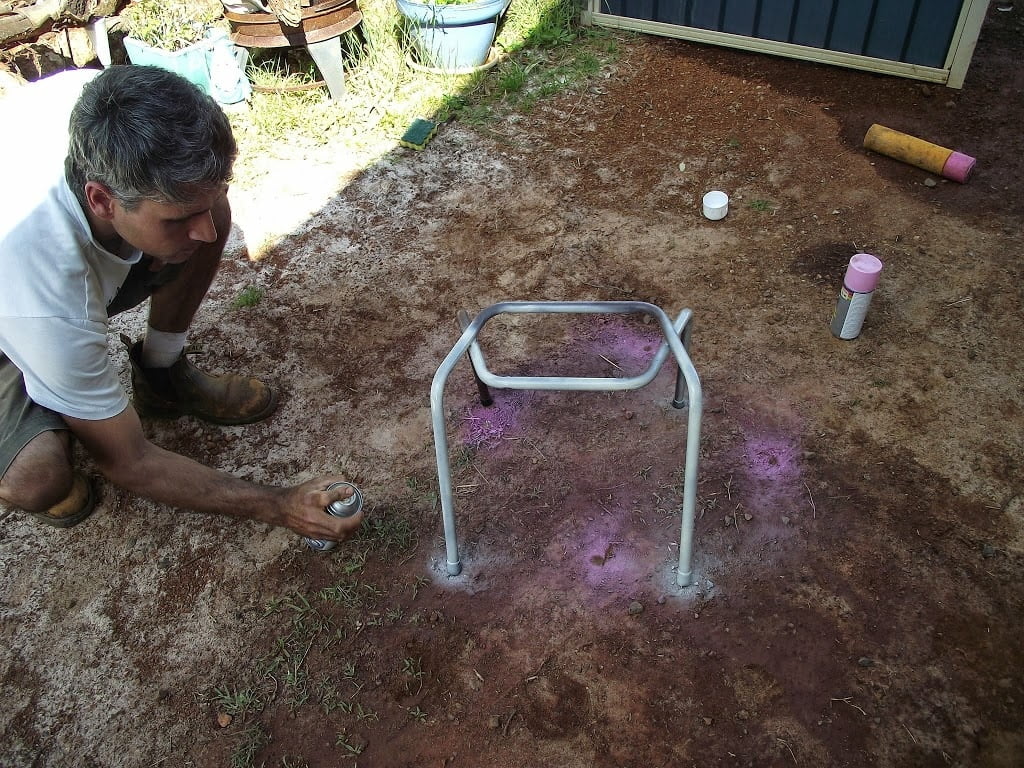
We ended up with some lovely bright trestles …just the perfect size to be within the height safety regulations for home daycare.


I put the boards onto the frames (the cleat hits the bar at top to stop them sliding away. They will need a coat of weather resistant lacquer but that job will have to be done when I have a moment away from the toddler twosome!
Trestle boards are so much fun for climbing, balancing and jumping off…..

And for walking, coordination and risk taking……………………..
 |
The trestles and planks were just the right height for toddlers and preschoolers and I was really pleased with how well they worked and that we could actually recycle the whole of the chair!
I set up an obstacle course and they followed it a few times and then chose to construct their own.

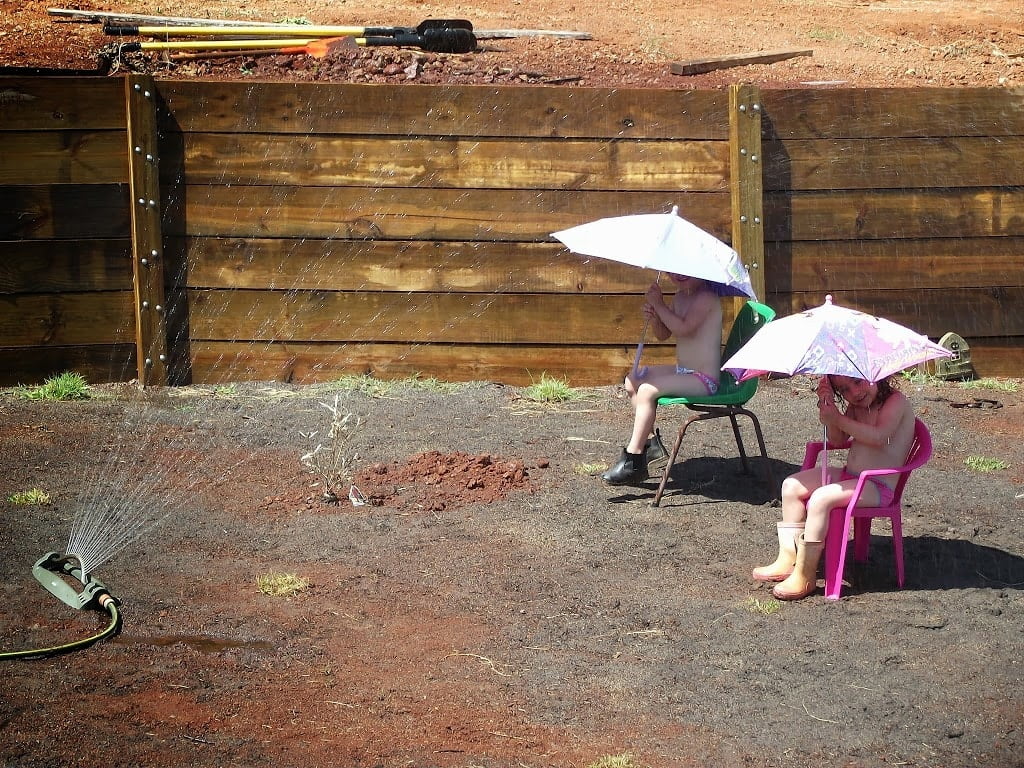
And after all that work it was time for a little cooling off under the sprinkler…with umbrealla and chairs too of course!

A Little About Me
")
Jodie Clarke is an early childhood professional supporting educators who want and need to stay passionate about the work they do! She has 30 years hands-on experience in the early childhood and human services sectors across many different roles.
Jodie is mum to 3 in Australia and has already helped thousands of educators with their work through her popular blog posts, activity ideas, online training and e-books.
You guys are ingenious, I love everything about this post! I will be on the hunt for old plastic school chairs now, those balancing stands are the best idea ever!
Cute, cute, cute! Where on earth do you find the time and energy to do all these things?
I want to come play! Love everything you have done, it’s incredible 🙂
oooh, I have at least 1 of these chairs, will be searching the shed later! I want to do both of these
You are so clever!! I adore the way you used the chairs, in both ways!! I bet the kids have so much fun! Pinning 🙂
so so so so so so cool. Love it so much.
I’d love to do this
You have the best outdoor play area, I’m sure the kids enjoy it more than any other park or play area around. I know my son would 🙂
Oh you are so clever!!! The chairs on the lump of wood… so simple yet I can see hours of fun being had there. And such a nifty way to make affordable climbing/balancing equipment… so clever!
Super clever. And the pics are great. How many kids do you have joining you?
Wow your backyard is turning into a toddler’s dream! And the last photo of them sitting there under umbrellas in their undies with their gumboots on – priceless!
Seriously!! You know how in love with your amazing pallet play things I am! Now this!! So jealous! I actually have a bunch of these seats.. I bought 6 of them for $7.50 a while back! We use two in the house but perhaps a few could be ‘sacrificed’ for this kind of play! Love the balancing trestles! Genius!
Jode, it’s beyond amazing, you know that right?!?! I LOVE every single part of it…but I think I keep telling you that 🙂 I have all the ideas filed away for a very neglected corner of our yard that we will hopefully get to one day.
Gosh, if we lived near you we would be organising a play date at your place pronto! You have such creative ideas with outdoor play areas, I love both of these projects. I remember playing for hours at my grandmothers on a pair of planks placed on top of two wooden sawhorses with a ramp going up (a bit like that but not exactly secure), literally we played for ages on them and did so every single time we visited. I’m sure they will be having a ball for years to come 🙂
WOW what great ideas!! My kids would LOVE this.
I can;t remember if i’ve comment on this. I know I’ve seen the images lots an pinned them. I just think it’s brilliant. Queen of the outdoor garden!
Too awesome Jode!! xo P
This is all kinds of awesome!
Your space is looking incredible.
Seeing photos of your girls reminds me of Last Day of School 🙂
So brilliant Jode. Love!!!!
what an amazing backyard you have. LOVE
Hi Jode, My name is Debi and I am from central Utah, in the USA. i love your yard, I want to come play! I am Mom to 6, 5 boys I mean men ages 33-23 and a 16 year old daughter. I am a grandma to 7 (with # 8 and 9 coming in November and December) and yes 6 of the 9 are boys. It is a theme in my life. lol. I teach at a local preschool with children ages 3-5 using the Montessori method. I especially love your quarry. I will have to go back through your other posts to see if there are better Photos of the yard. Have a lovely day. Debi
Love your yard and your blog. Debi from Wales, Utah, USA.
I love this idea so much and this post was just what I was thinking of this weekend when I found some of these chair seats in our local recycle store. I only have the seats, and am thinking I’ll just let the children play with them before mounting them on a log, but I like that idea too. Now I wish they had the frames attached so I could do the trestle boards as well. I’ll have to keep my eyes out for those in the future! I also have an in-home daycare, so love seeing all the great ideas. Thanks!
Jode all of these ideas are amazing. I love that you were able to recycle all of the chairs – what a clever idea for the balancing beams.
Hi Jodie.. Thank you for sharing your brilliant page… My head has been exploding with ideas… And defenitely very eager to start my projects… I love what you have done on both pinterest and facebook. Terrific work and your play area is amazing . I could definately spend hours just watching the kids havin fun.. Thanks again. Elena. 🙂
Oh my goodness, just look at your yard! What a GREAT play space!!! I too will be on the lookout for some old school chairs now!
What a fun idea this is with the chairs and make it into a pretend bus. My two kids would surely enjoy it if we have something like this in our yard. 🙂 And love the kids with the umbrellas and the sprinkler. LOL! Cute!
Makes you think about people buying those huge play structures that really never change compared to your ingenious, budget-friendly, infinitely changeable homemade one. I can see doing similar in my yard for the 2 year old!
Awesome ideas! It is good to see that other parents have great diy ideas, you and others like you are the reason why I built a natural sandbox with landscaping bricks, some weed liner and digging. So much nicer to come up with own ideas than to follow the trooten plastic Wally path. Thank you for inspiration. PS my little one totally got into imaginary car driving using a propped up pillow as her car seat in our bed and us being the driver and her room turns into a groceries store, slides, aquarium, pool, whatever you can imagine. So I totally support your seat project.