We enjoy creating an environment that attracts birds and other wildlife to our garden and when the children told me the birds were hot and needed a drink we decided to make our own little garden birdbath to place around the yard! It really is such a simple project and the children can be involved in every step of the process while creating their own unique work of functional art for the birds in their backyard.
Want to have a go at making your own with the children? Follow the simple instructions below and let's get started!
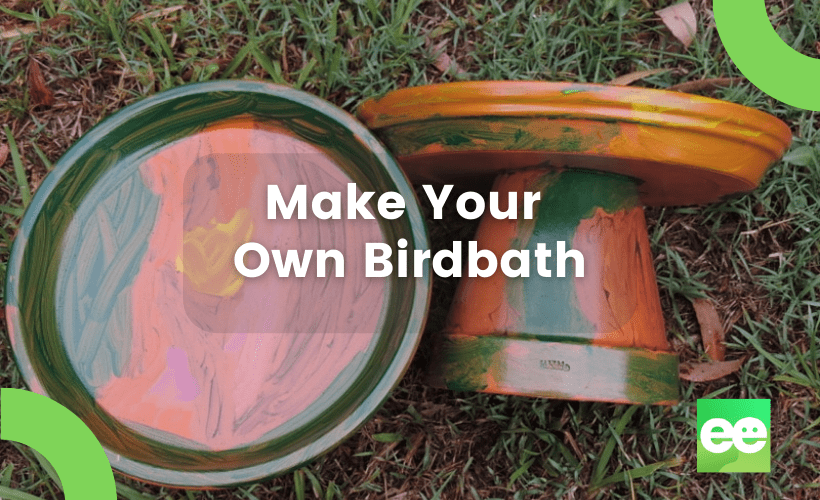
How to make your own Garden Birdbath
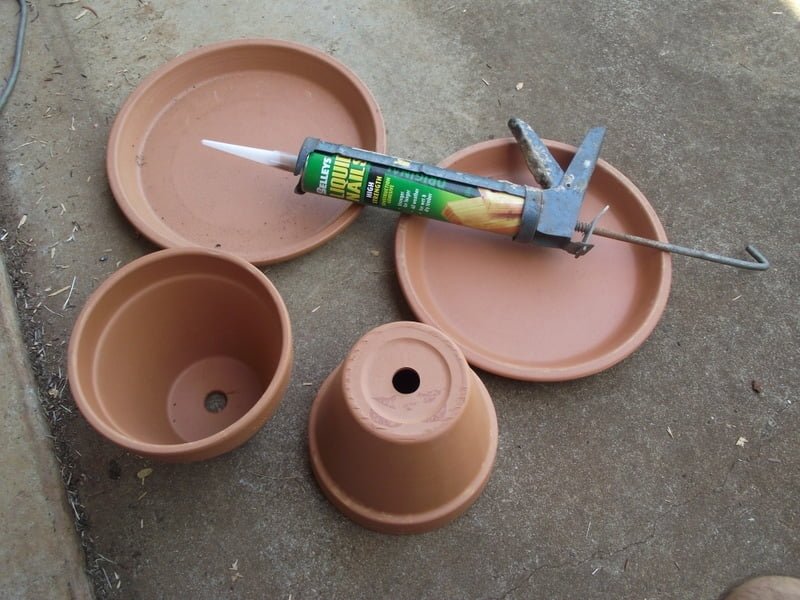
What you need…
The materials listed below will make 2 birdbaths – obviously if you are making more you will need additional materials. If you want to do this project with a group of children why not save on costs by choosing smaller saucers and pots. The results will be the same and the smaller birds will enjoy their birdbath just as much!
- 2 terracotta saucers (size dependent on the size birdbath you want to create)
- Tube of liquid nails waterproof glue or similar
- 2 terracotta plant pots (1-2 sizes smaller than the saucers you have chosen)
- Acrylic child friendly craft paints and brushes
- Clear lacquer/sealer spray
What you need to do now to assemble & decorate your garden birdbath
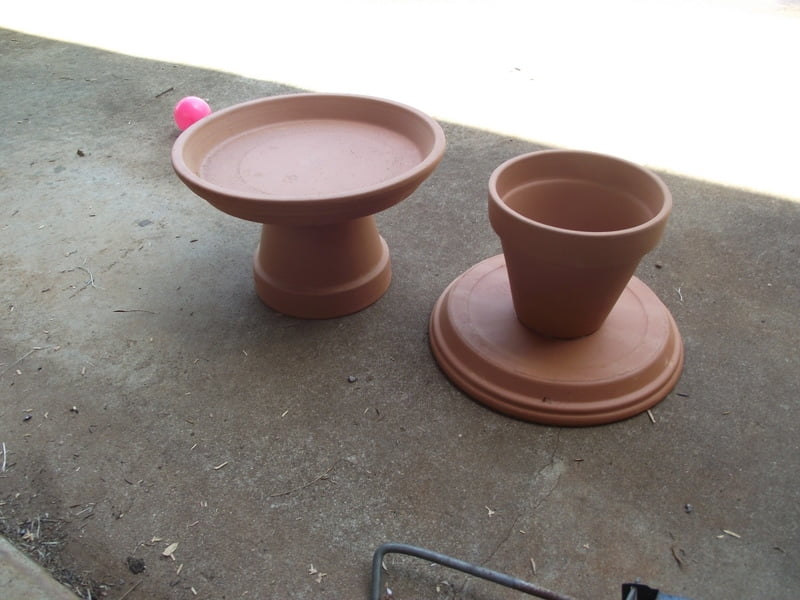
1. Turn the pots upside down and squeeze some of the liquid nails glue around the bottom as shown below.
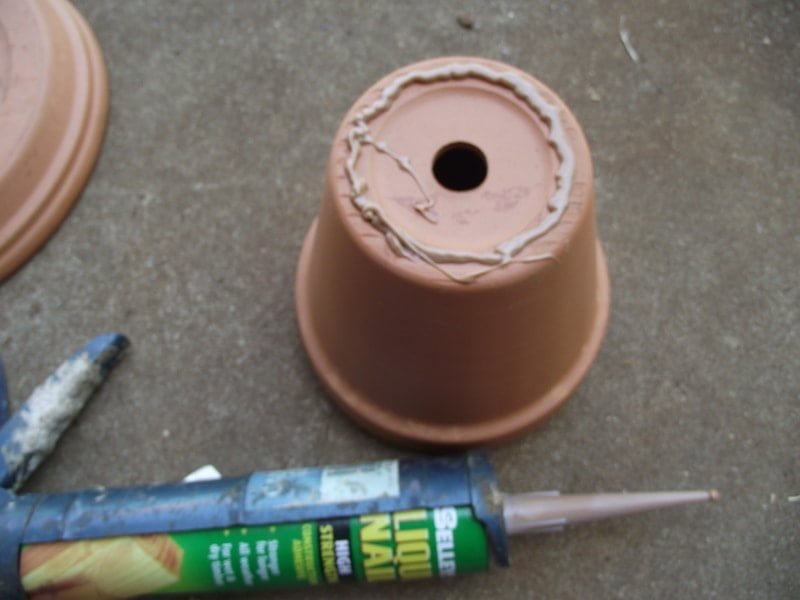
2. Turn the saucer upside down as well on a stable surface then press pot (glue end) firmly onto the upturned saucer in the middle. Hold for 30 seconds – the children loved helping out with this part and took their role very seriously!
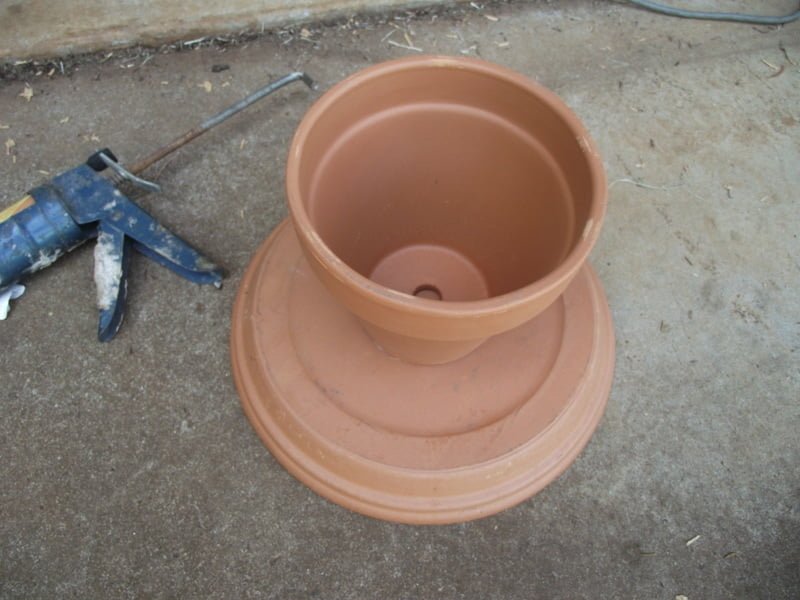
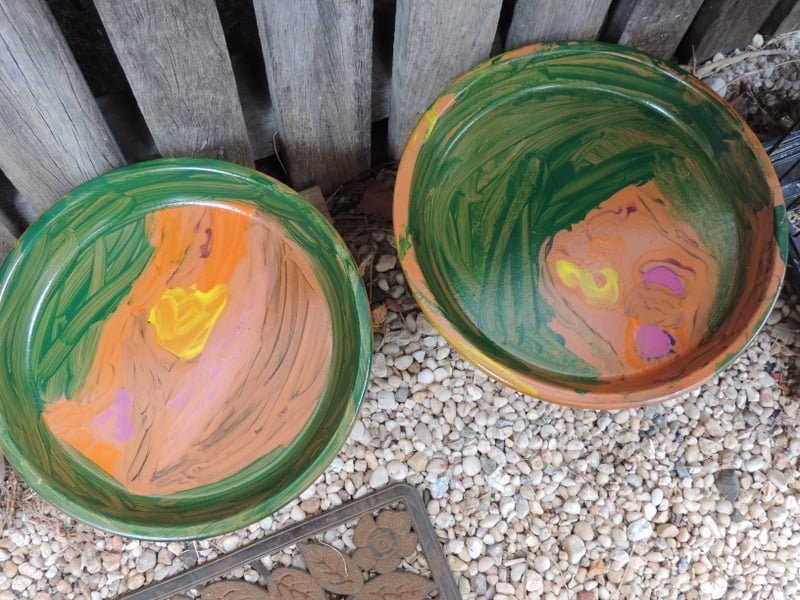
3. You should now have something looking like the pots in the picture below – how easy was that?! Leave to dry for a few hours or if you have the time overnight is even better – especially if your children like to use a lot of paint like mine do!
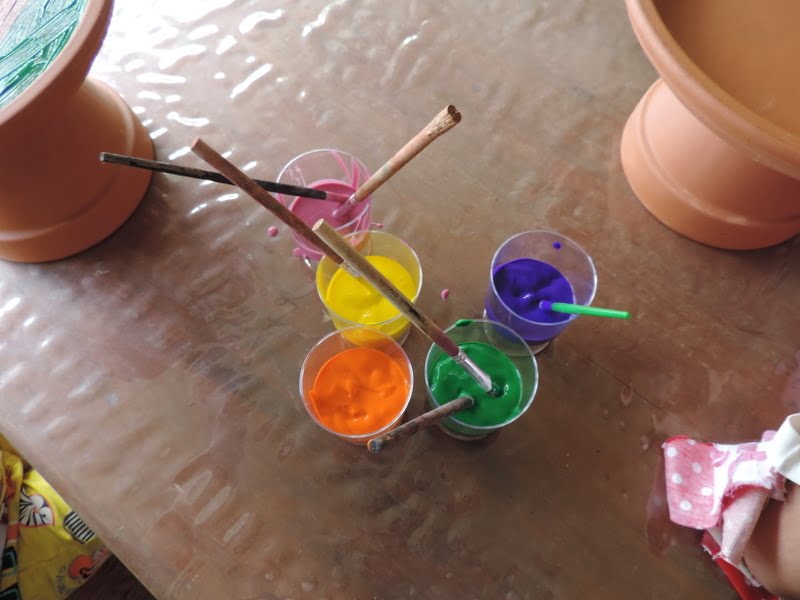
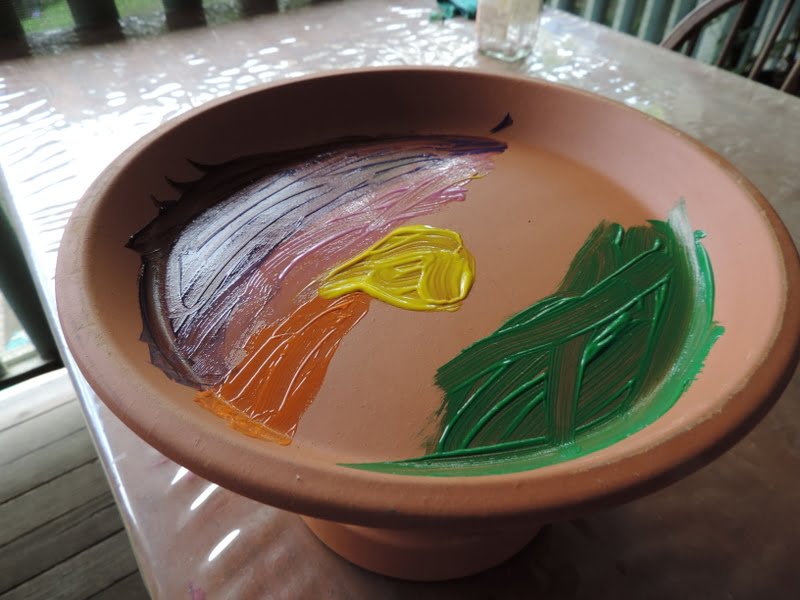
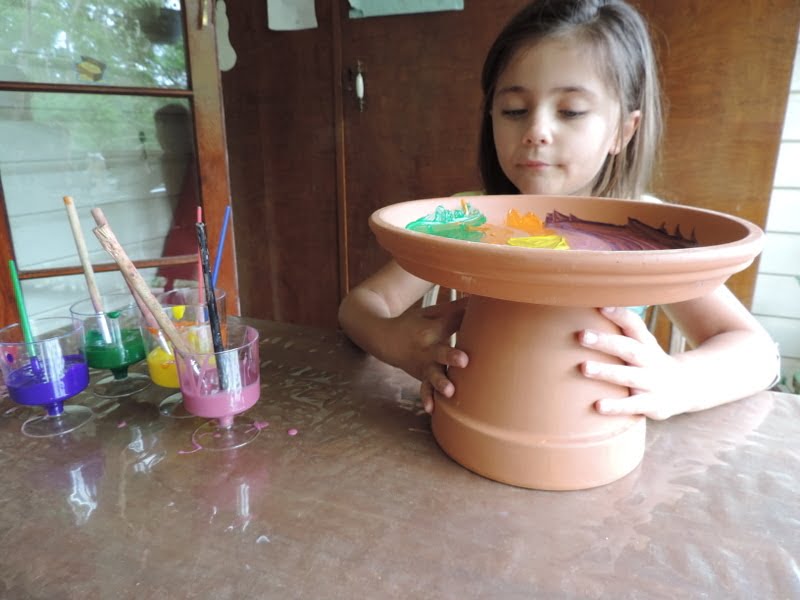
4. When the pot and saucer are firmly fixed together it's now time to get creative with the paint. You could of course use just one colour paint but the colours below were the ones the children decided on and as it is their project to personalise I followed their suggestions.
5. Now it's time to step back and let the self expression and creative process unfold.
If you are doing this project with younger children I suggest modifying by using smaller pots and saucers and placing down on the floor or grass so they can easily paint – they will also probably prefer to use their hands to explore the textures!
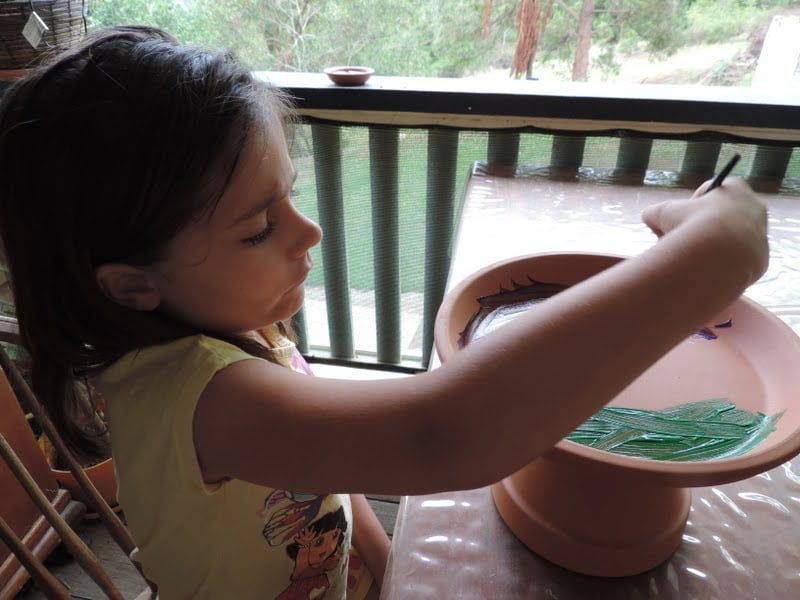
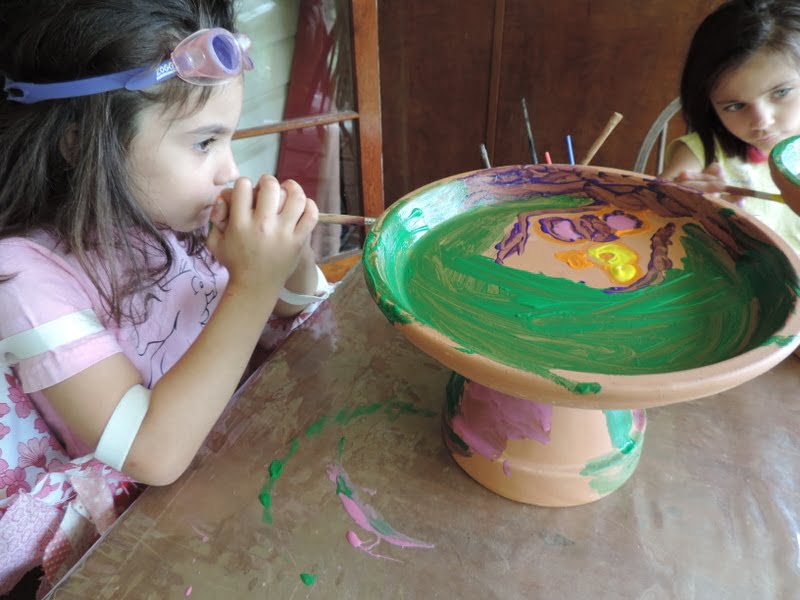
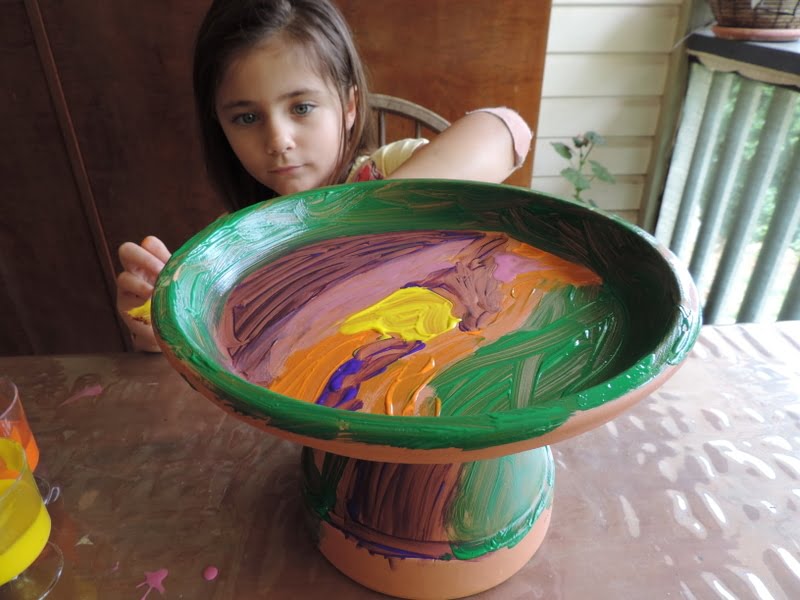
I love watching the way different children choose to express themselves with projects like these – try not to interfere and tell them to cover every space, it is their masterpiece and they will tell you when they are happy with it.
This won't always meet our ‘adult expectations' but the experience is what counts and I'm sure you wouldn't like someone telling you how to paint or make something look ‘better' when involved in a project!
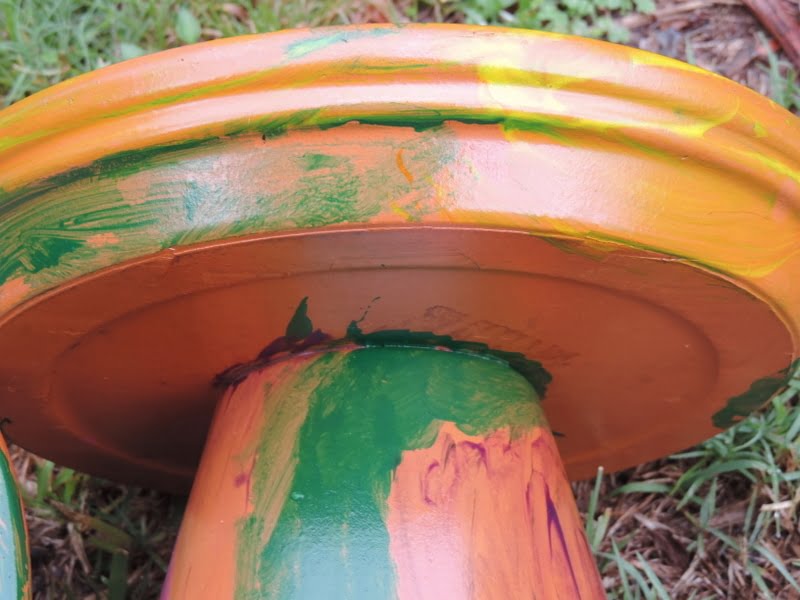
There is certainly no need to cover every part of the birdbath with paint but you might like to help them turn the pot in different ways so they can access the underside if they want to.
Don't worry if they use a lot of paint and it is quite thick in places – it just means you will need to allow for a longer drying process – the terracotta soaks up quite a bit of moisture so thicker is actually better!
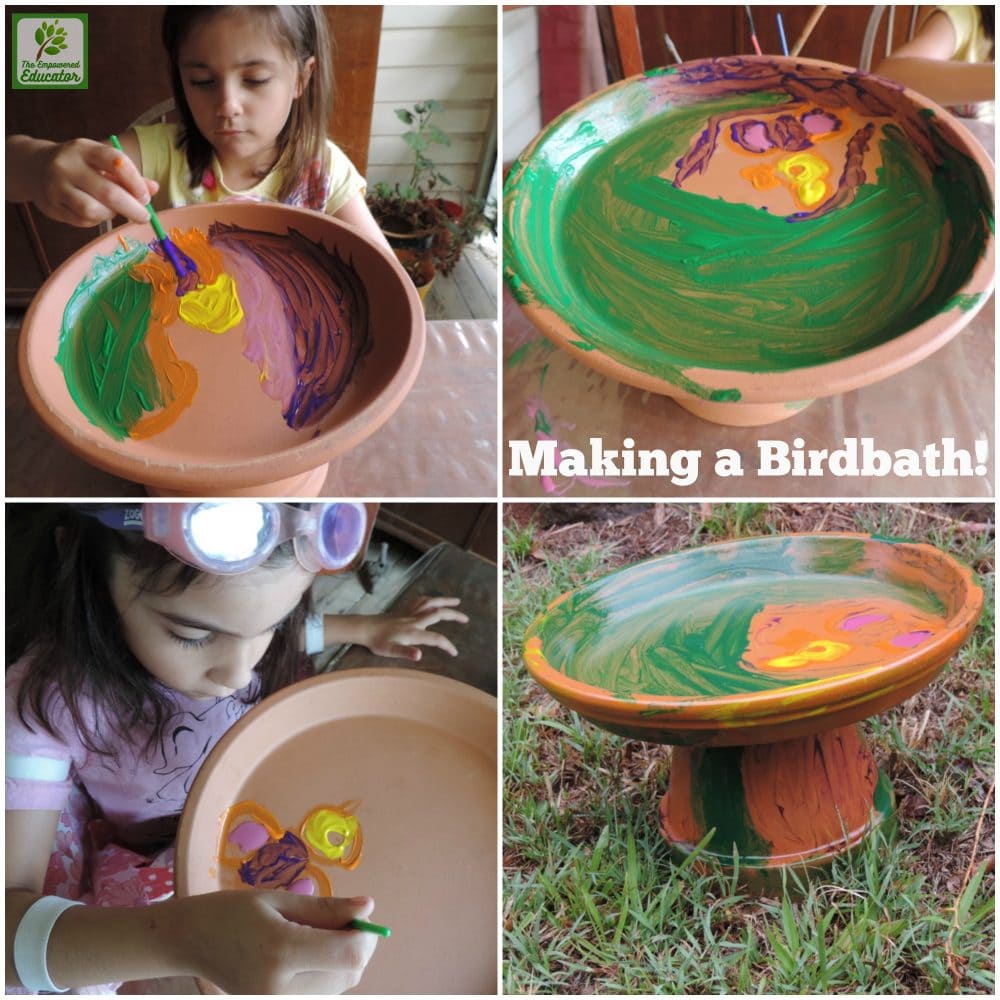
As you can see from the little faces below this project invited a lot of concentration – important work was underway here! (And obviously the swim googles were needed because they would not be removed – nor would the fairy wings!)
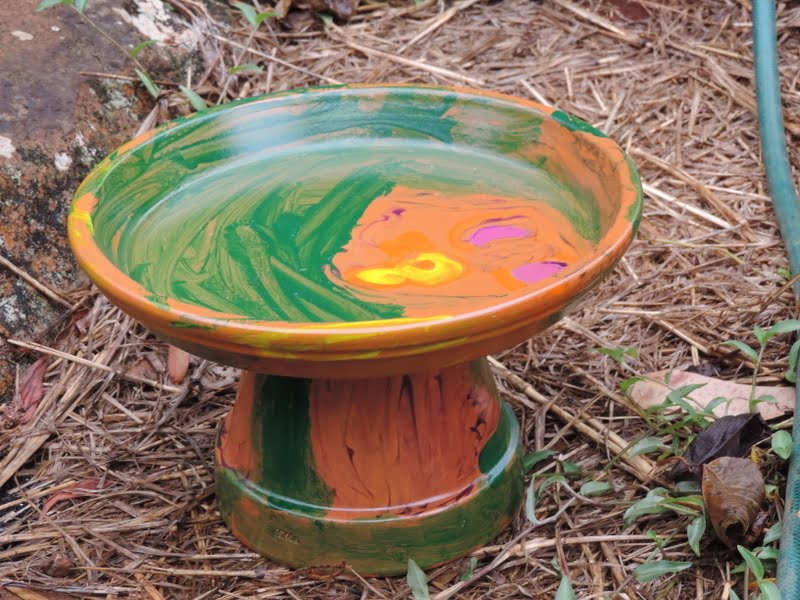
When the children are happy with their creation explain that you need to set them aside for a day to dry out (longer if you are painting in humid or wet weather) then it's time for the final step.
Take outside and spray your clear lacquer/fixative over the birdbath paying special attention to the saucer as you want it to hold water and terracotta will suck in water if not sealed.
The spray will also help the colourful painted art to stay in place as acrylic paint will eventually wash off when exposed to rain and outdoor elements if not sealed.
You could use special exterior paint but I don't like using this with children.
Now you are ready to find that special spot in the garden or on a verandah perhaps. Just remember to place your garden birdbath up out of reach of neighbourhood predators like cats.
The birdbaths also make lovely child made gifts – We gave ours to the garden loving grandparents for a unique Christmas present.
If you want to extend the learning and play with the children why not try some of the following ideas…
- Help the children to take photos of birds that might land in the bath or yard over a week. Print photos and paste in to make a journal.
- Look up the birds you have recorded on the internet or explore books to help identify and name the birds in your area.
- Start a discussion about what the birds might be eating in your yard or where and how they might be making their home.
- Provide drawing materials and paper and encourage the children to draw the birds that they have seen taking a bath or flying around the outdoor play areas.
- Collect dropped feathers from around the yard or ask children to bring in any they find at home then chat about colours and size – sort into large and small groups or by colour.
- Add some water and dye to recycled containers and paint using the collected feathers.
- Work together to regularly clean and top up the birdbaths and let this lead into conversations about how we as humans can help care for living things in our environment. What other living things are in their care or home environment?
- Build some simple nesting boxes as a group project using real tools.
- Set up a dramatic play area as a ‘bird-watching station' Provide binoculars, cameras, writing pads, books with bird pictures, drawing materials.
- Look at pictures of the birds and help children to identify differences – wing size, beaks, feathers, colours, shape etc.
They are so many ways to extend the play and have fun attracting birds and other living things to your outdoor spaces!
If you would like more ideas and inspiration like this one why not join other early childhood professionals from across the world in…
A Little About Me
")
Jodie Clarke is an early childhood professional supporting educators who want and need to stay passionate about the work they do! She has 30 years hands-on experience in the early childhood and human services sectors across many different roles.
Jodie is mum to 3 in Australia and has already helped thousands of educators with their work through her popular blog posts, activity ideas, online training and e-books.
Love this idea so much and it’s so simple to make and fun for kids to paint.