I’ve noticed a gradual return to more natural outdoor play areas for children across the past few years which is wonderful but I know it can seem overwhelming when it comes to designing or revamping the outdoor environment when you can’t afford a landscape designer or huge labour costs.
For those that can afford to work with a landscaping team and have the budget for those big ideas I say go for it – they create some wonderful spaces (just do a Google or Pinterest search to see what I mean)! However, for those of us who don’t have that sort of budget, time is limited or you work as a Family Day Care Educator so your backyard is also your outdoor play area – I have some ideas and strategies in this new ‘Designing Outdoor Spaces’ blog series to help you at least get started and move forward at a pace (and cost) you can handle yourself!
If you missed Part 1 (Assess & Reflect) you can start the series HERE.
In the first blog post in this series I showed you how to assess what you already have, what you want, why you want it and how you are going to make it happen.
In this second part of this series I'm going to be sharing some tips, strategies and action steps to help get you started with the designing and creating part of your new natural outdoor play area.
A little disclaimer for you before we begin – I am in no way a qualified landscaper or designer of any kind…just a Mum and early childhood educator who understands how and what children need to embrace outdoor play…and I don’t mind getting my hands dirty in the garden or in our case lots of red dirt!
Let’s get into Part 2 of the Designing Outdoor Play Spaces series! Work your way through the steps outlined below, pick out what you feel would be helpful to you, add them to the assessment you made after reading through part 1 and you are going to have that outdoor play space sorted in no time!
Step 1 – Sensory, Quiet & Secret Spaces in Natural Outdoor Play Areas.
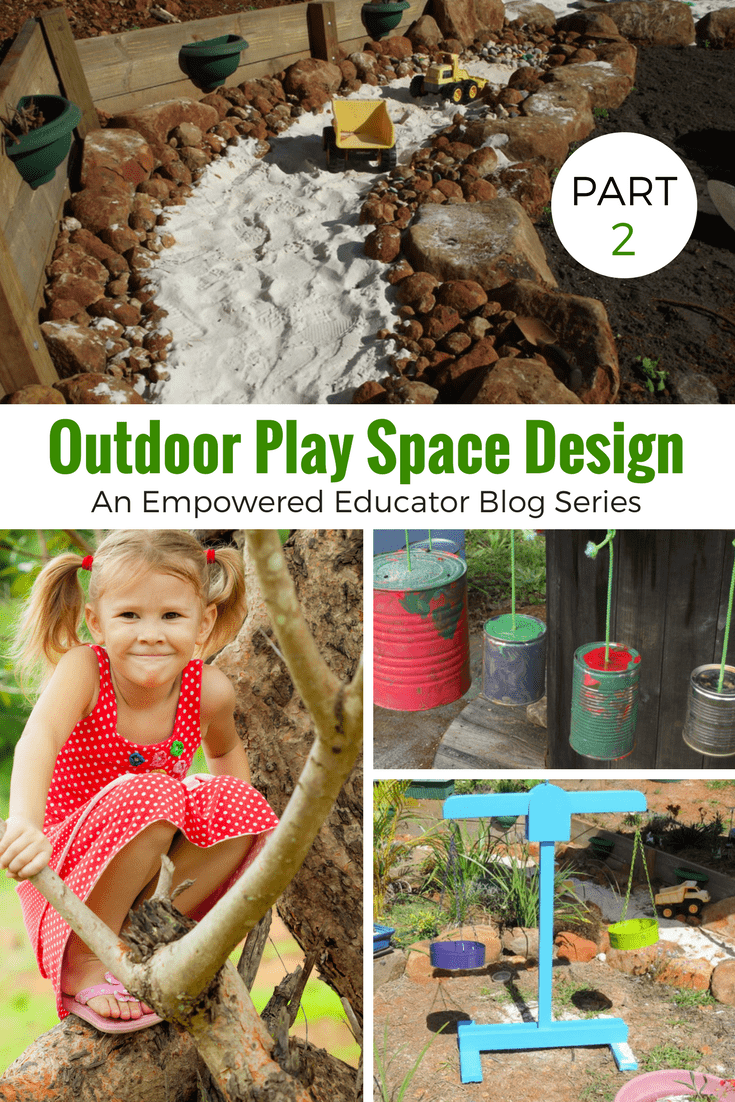
One of the first things I like to do when creating a new play area from dirt or overhauling an existing space is think about how I can break up the space into smaller areas and what budget friendly materials or planting I could use to do this. I suggest starting with the essentials – in my opinion this includes finding ways to incorporate smaller sensory, quiet and ‘secret' spaces throughout the larger outdoor area.
Why is it important to design smaller spaces and interest areas in an outdoor environment?
- To support the full range of developmental needs and learning outcomes.
- Creates opportunities for educators to set up different invitations to play.
- Encourages the exploration of different interests & needs.
- Play can evolve in smaller groups or individually – can lead to more collaboration, problem solving and cooperation as they direct their own play.
- So children can seek privacy & and allow their play to evolve imaginatively without fear of constant adult interference.
- Helps to promote an atmosphere of engaged and open ended play.
- Clearly defined spaces can lead to either loud, active, or quiet play. Children of all ages come to understand the boundaries and possibilities of each space and feel a sense of ownership as they explore and extend play.
- Quiet or sensory spaces can support children who might be experiencing sensory overload during outdoor play and provide better opportunities for self regulation and calming self.
- Complements & extends on the indoor learning currently occurring within the program.
- Minimises opportunities for conflict as children are able to find their own space to explore individually or as part of a group using the different resources and tools available in those areas – or bringing their own to the space.
- Allows for spontaneous small group experiences and intentional teaching opportunities.
There really are no “RULES” to follow. Creating different spaces (even if your outdoor area is already small) is just something I have found works very well for all ages – especially when sharing the environment across multi age groups!
Think about the assessment you made of your area and what you identified as being important to you as you create your spaces. You know best the space, budget, helpers and children you have to work with so this is truly a step that will differ for every educator, parent or service. Your answers to the following questions will help you identify where to start.
- What are some of the different areas you might like include to provide a quality natural play space and learning environment?
- What areas currently work inside?
- What has been working so far for current ages, stages,interests?
I suggest writing down your answers then working through my list of ideas below to help you with a little design inspiration!
Consider the following ideas to help get you started ….
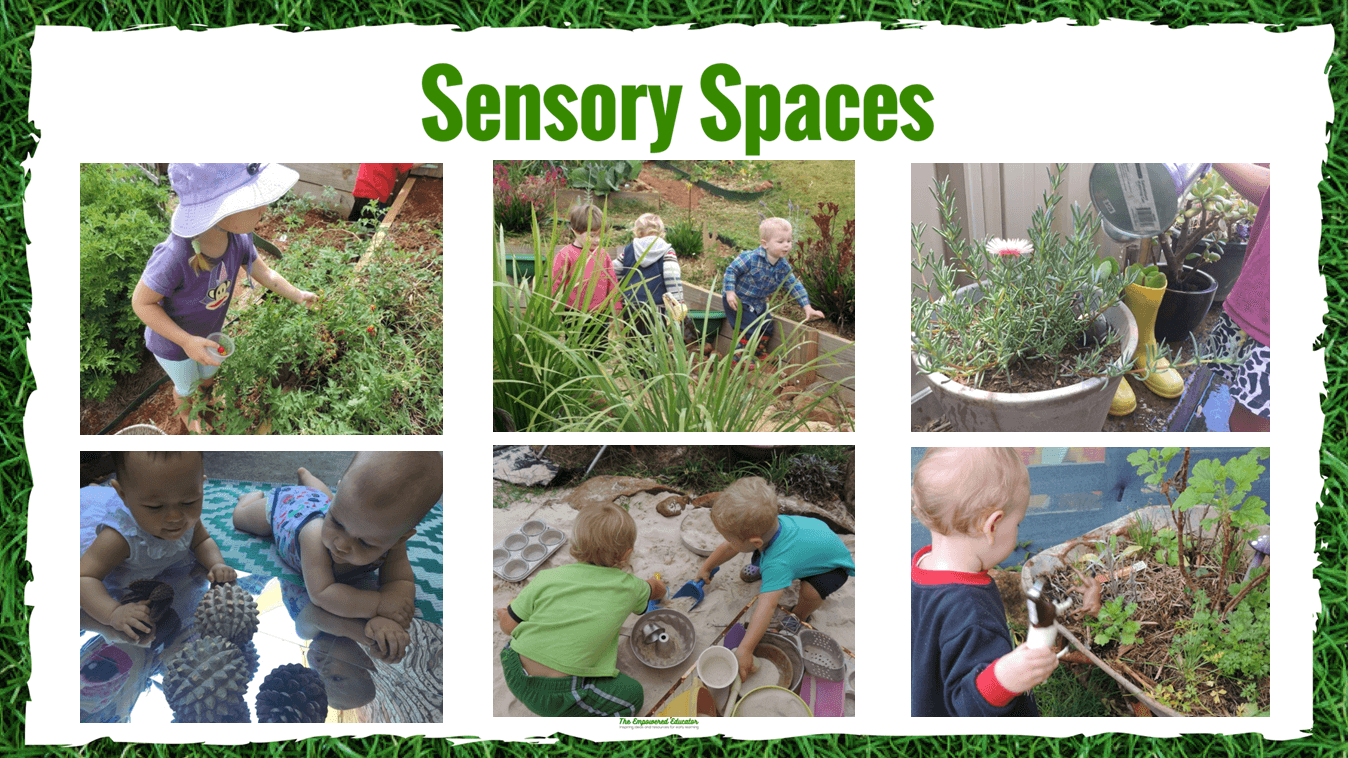
- Sensory Spaces – think about planting colourful flowers, different smelling herbs, grasses and bushes with different textured leaves to excite senses as they brush past. You might also include gravel, water or other simple sensory elements.
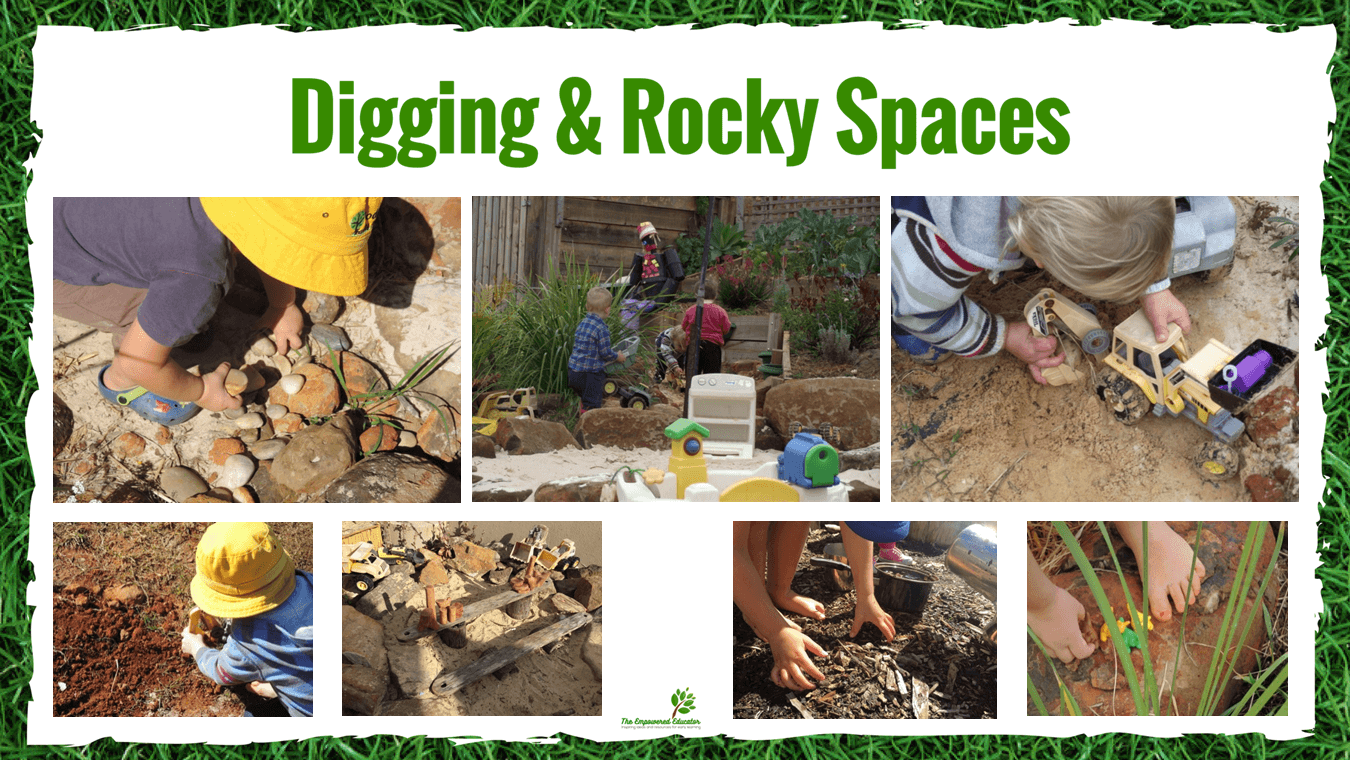
- Digging & Rocky Spaces – stones, pebbles, bush rocks for climbing, gravel, dirt, mud.
- Secret Spaces – easily created with screening plants, trees, mud kitchens, logs, stumps or pallet ‘walls' that enclose a space but still allow for supervision from a distance!

- Open Spaces for rolling, running, noisy and active games and play.

- Sustainable Water play spaces – think about water tanks, watering cans, water troughs setup to reuse water on gardens at the end of the day, hand pumps, systems that recirculate the water near sandpits or mud play areas.

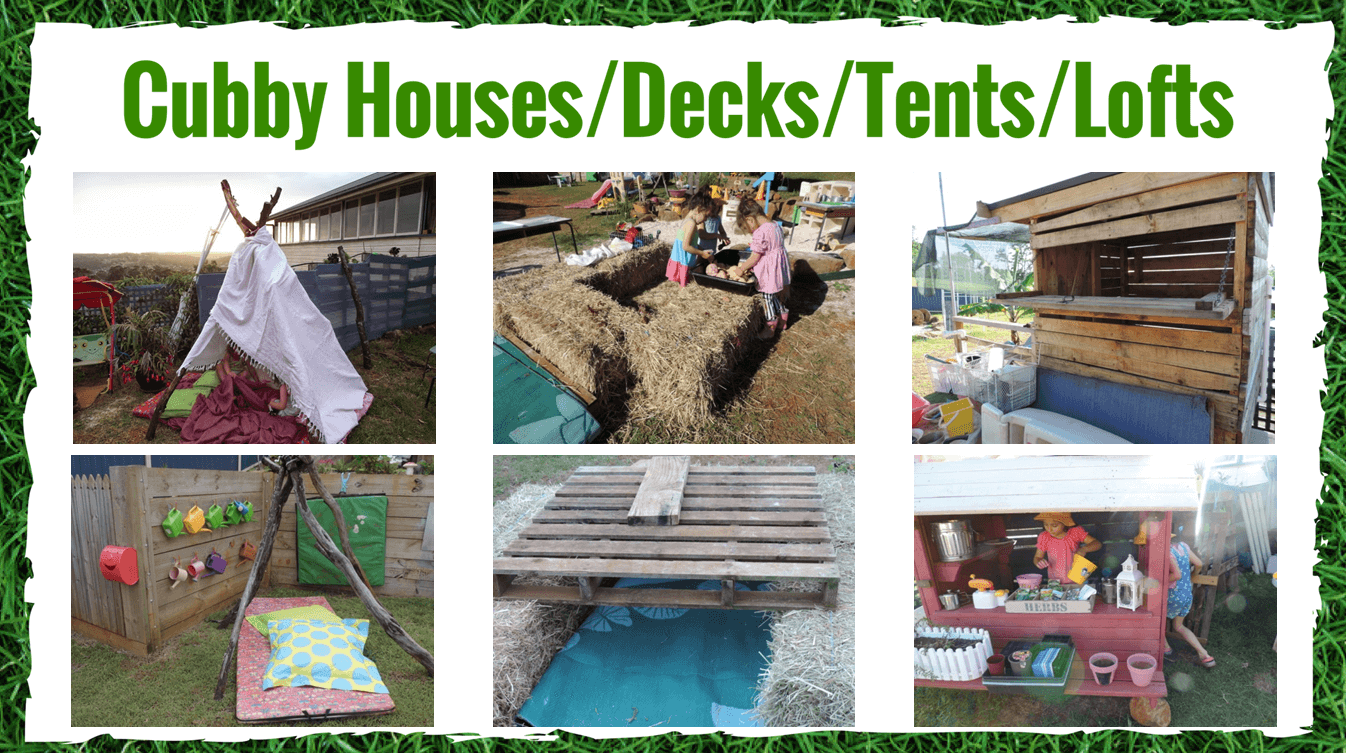
- Cubby houses/tents/lofts/decks – use your imagination and lots of recycled or upcycled materials to build with. Provide balance by making sure to provide open ended materials for the children to access to make their own constructions.
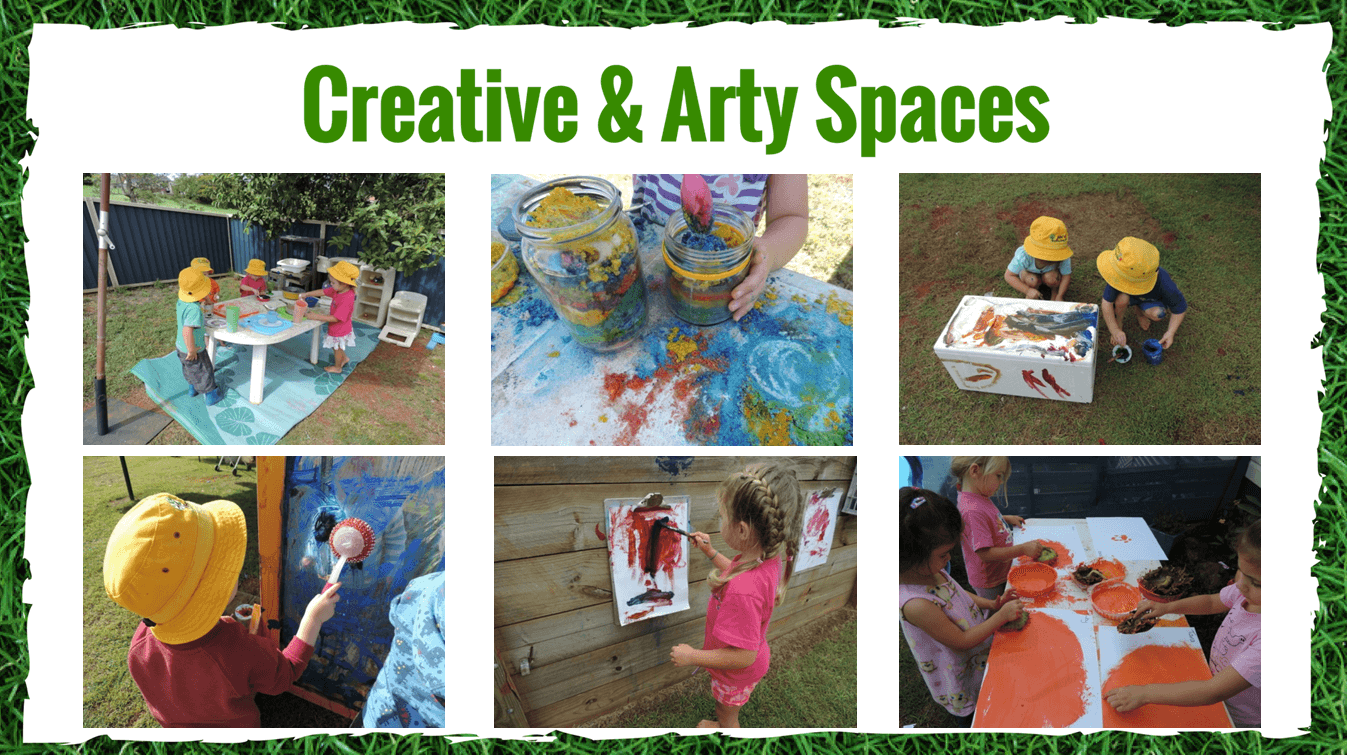
- Creative and Arty Spaces – provide materials for children to express themselves creatively outdoors at any time during play. Also use for structured craft activities allowing them to run off and play when finished or revisit the activity throughout each session. Create display areas outdoors for children's work.
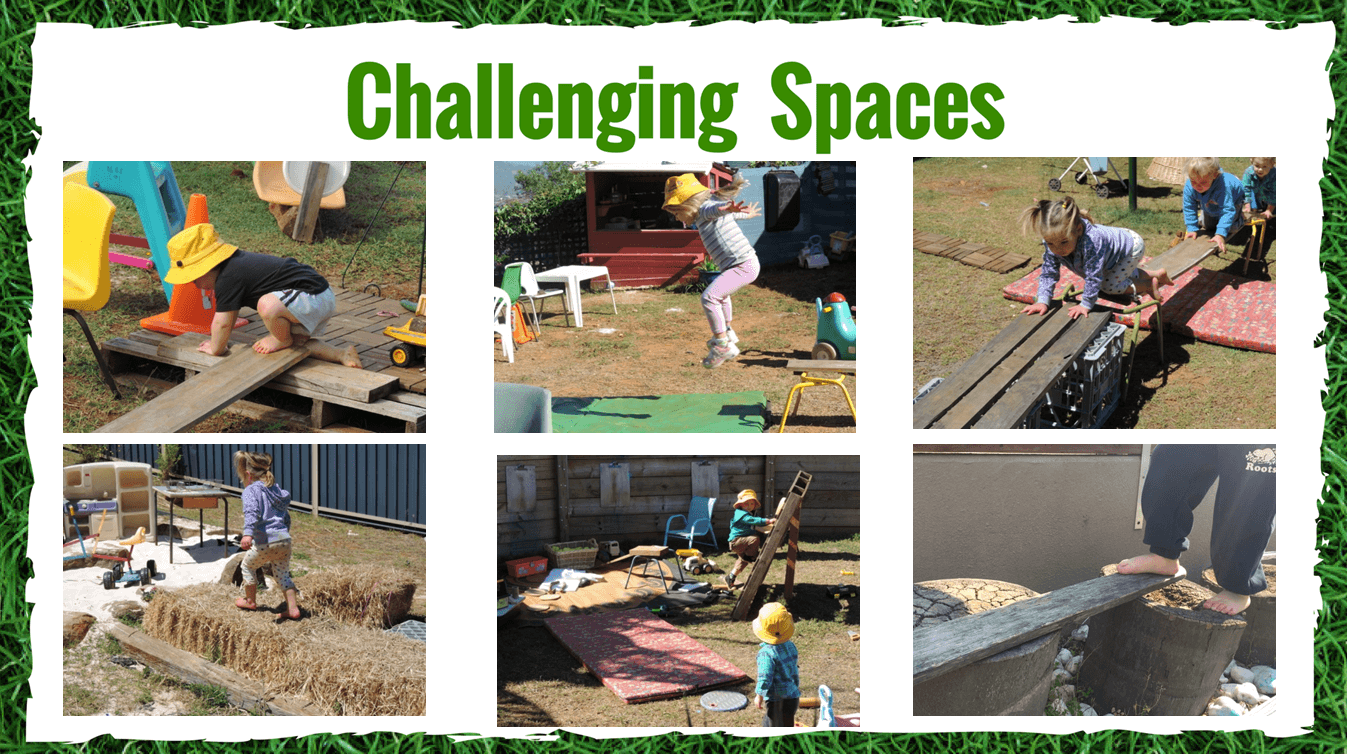
- Challenging spaces – Incorporate materials that encourage children to explore and challenge themselves. Think about the benefits of the challenge v the possible risks involved as you design.
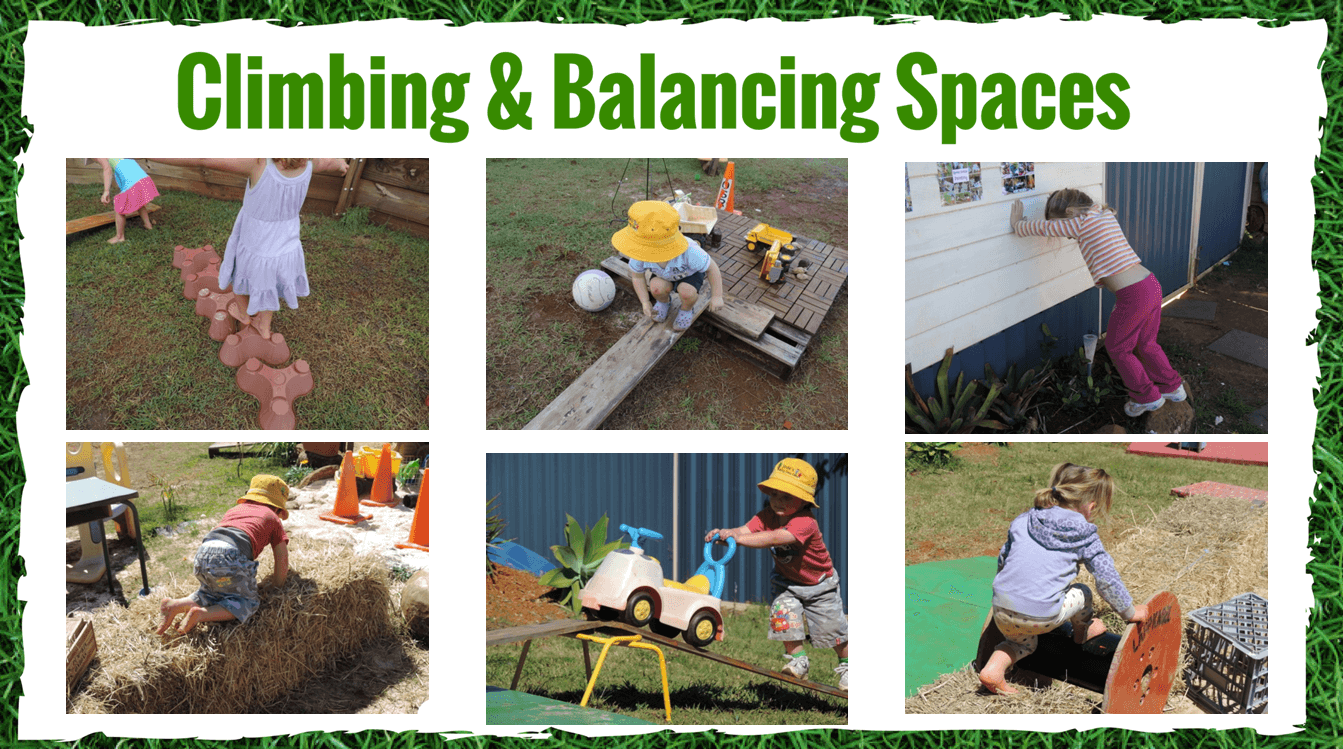
- Climbing and balancing spaces -if updating an older space use the climbing trestles and planks you have in different ways -add to open ended materials like tyres, logs, stumps, pallets, ladders and more!
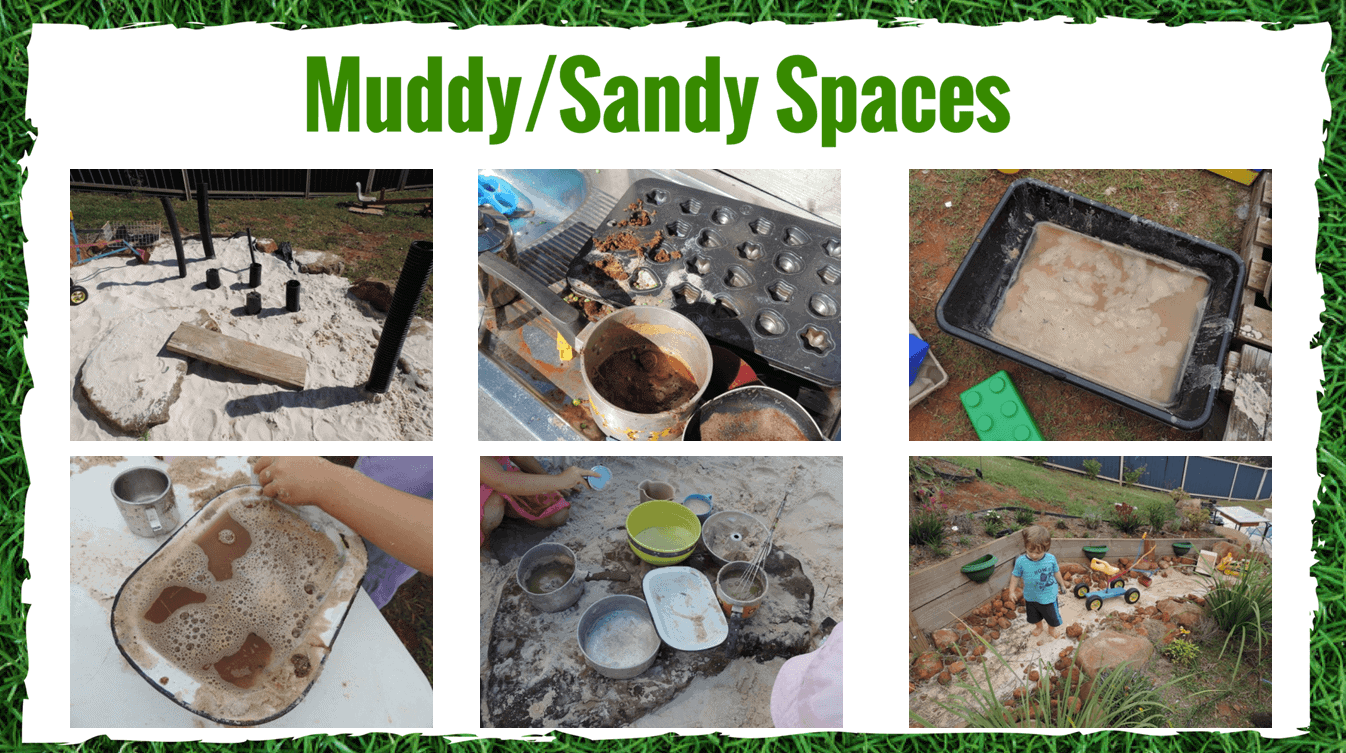
- Muddy/sandy spaces – Make sure they are easy to access and provide opportunities for children to add to the space with other materials.
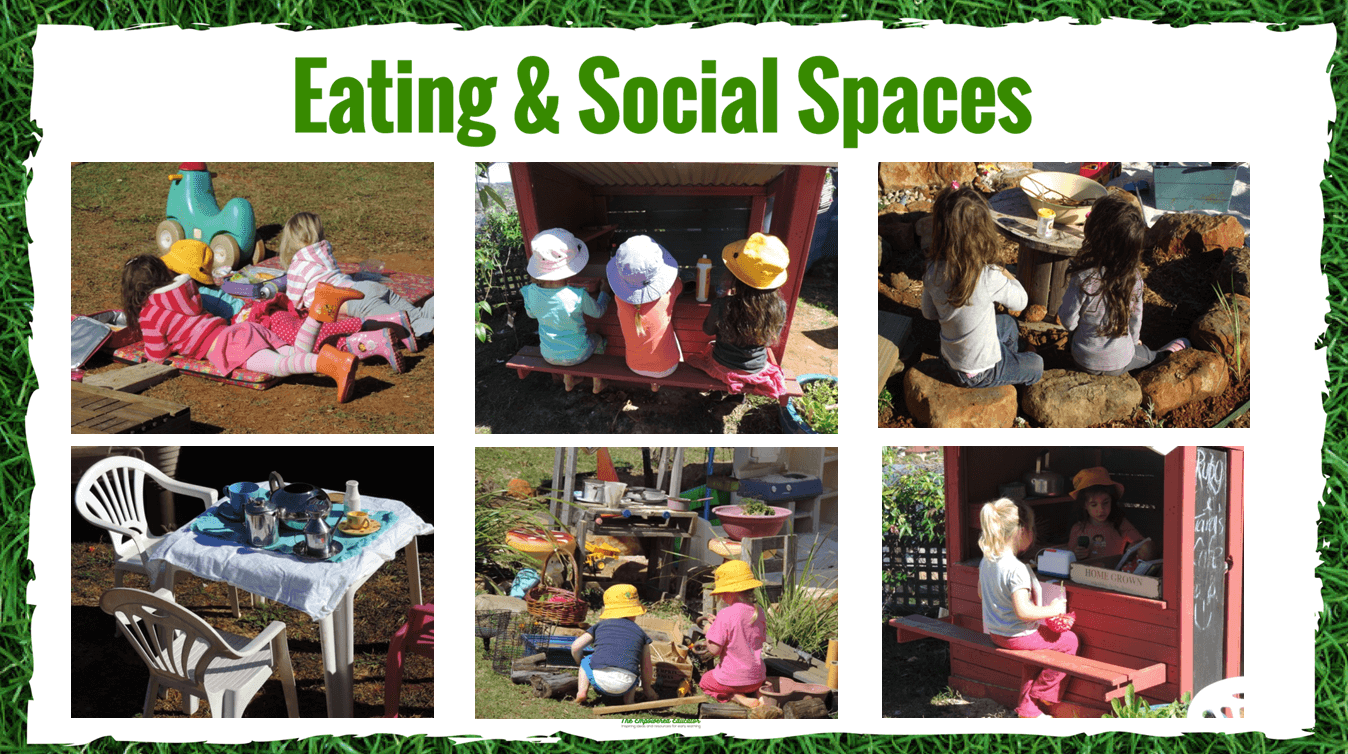
- Eating and social spaces – eating outdoors is always more fun and a whole lot easier to clean up! Think about shade, logs or stumps for seating and makeshift tables or just an open area to lay down a blanket. Simplicity is the key here!
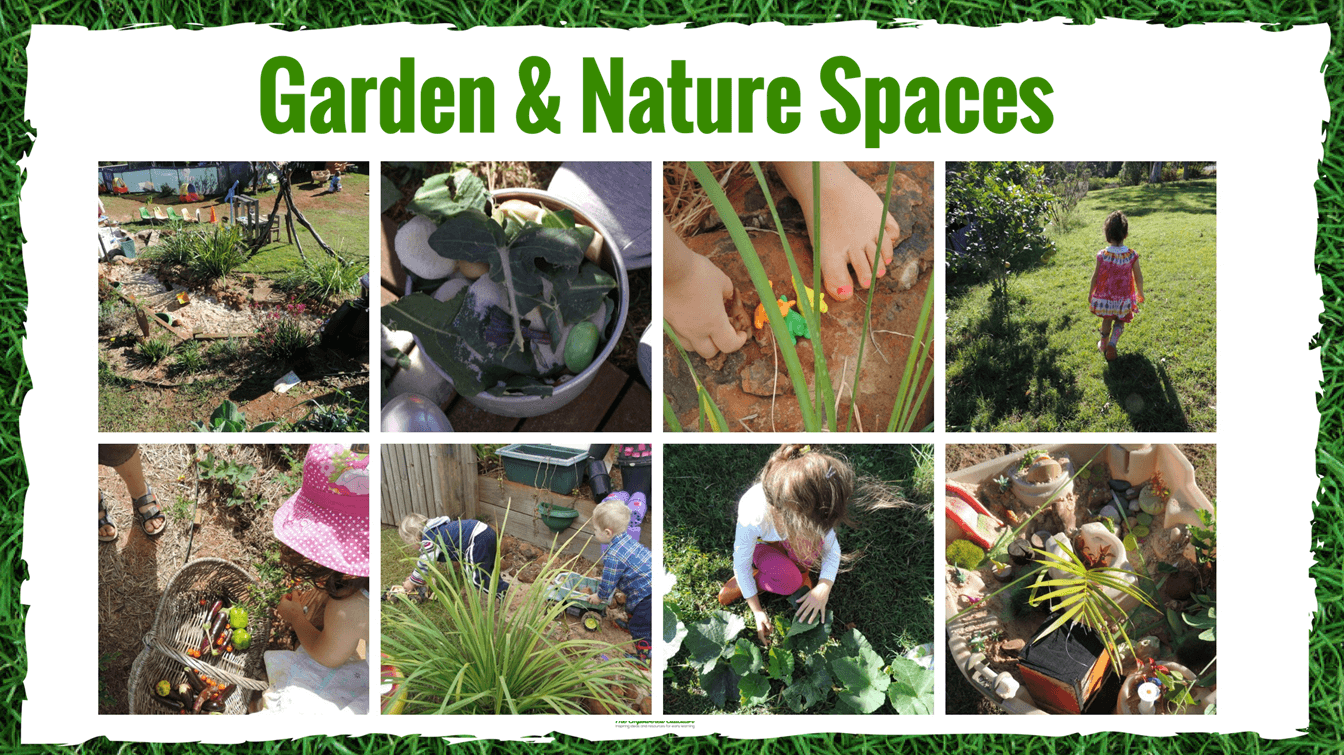
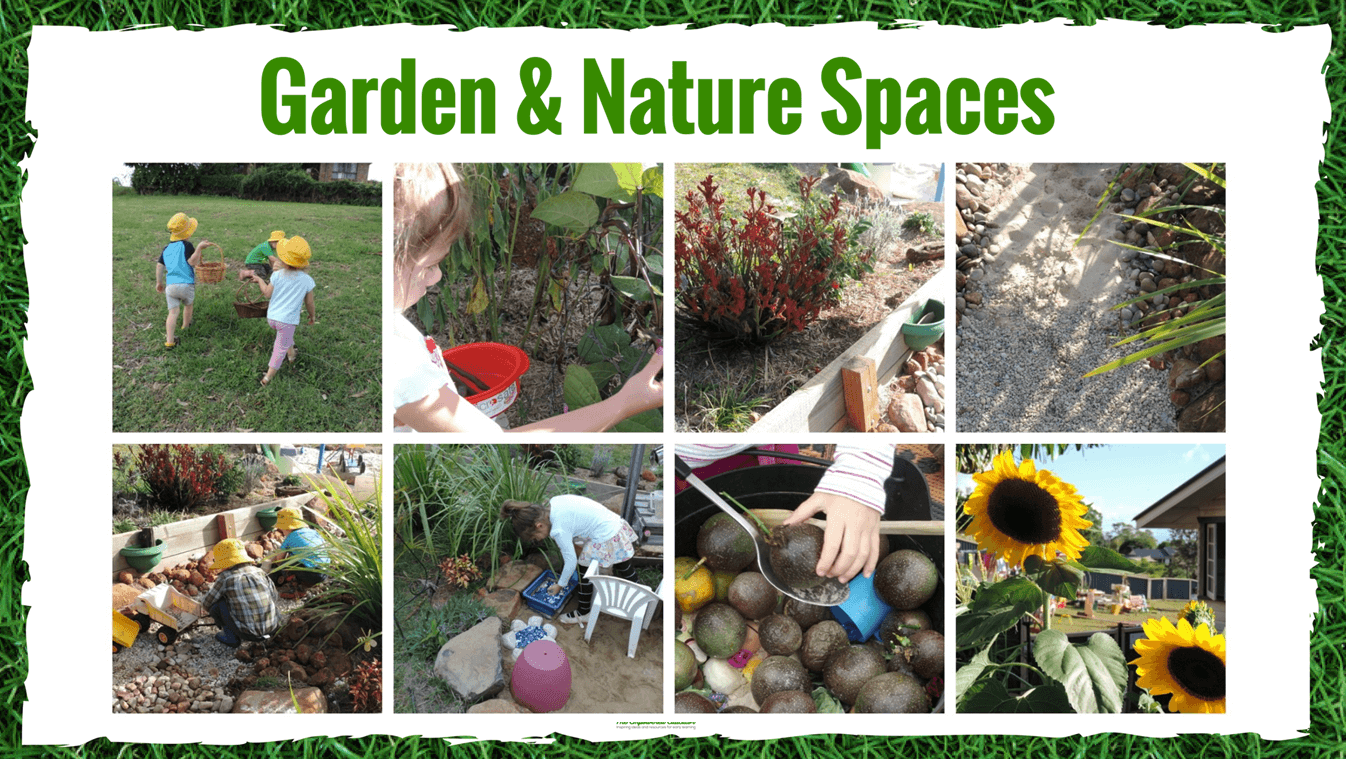
- Garden and nature spaces -if you have no room for large gardens or planting try to at least add some greenery, vegetables, flowers or herbs arranged in some pots or baskets of natural materials for the children to touch, investigate and access.
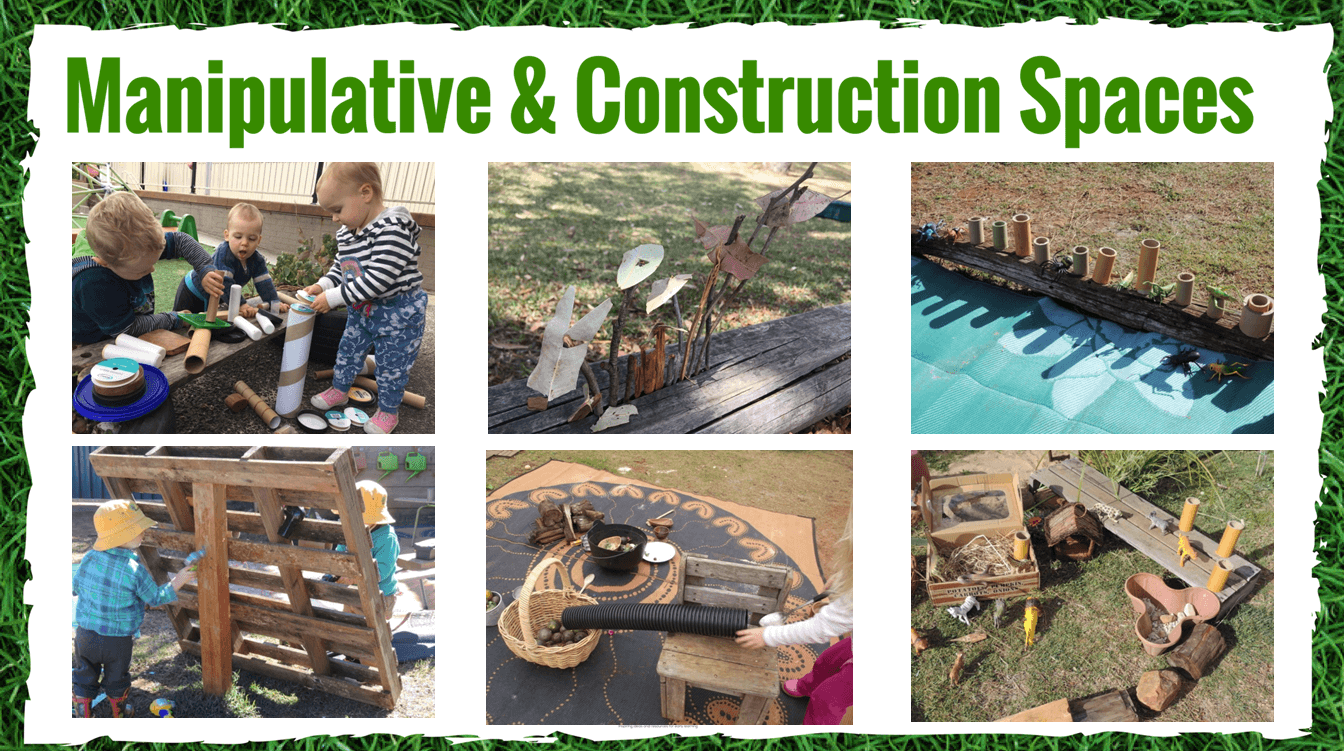
- Manipulative and construction spaces -blocks, tinkering, tools and building isn't just for indoor play in the block area! Get creative – set aside construction materials to be stored outdoors. Add buckets of loose parts and recycled items for children to explore and add to their manipulative play.
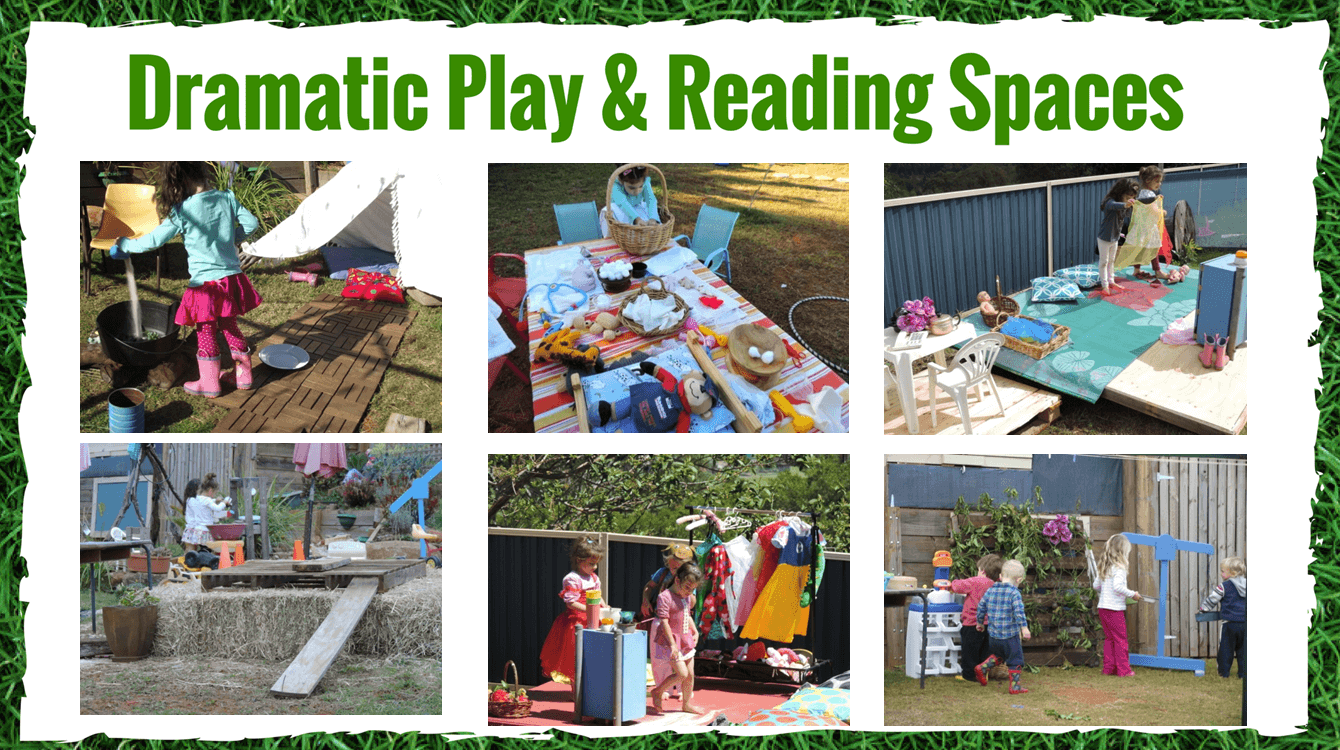
- Dramatic play and reading spaces – Even if you can't set aside a dedicated space like an outdoor stage for dramatic play – you can add a few outdoor cushions, a basket of gauzy material to drape over trees, dress ups, props to explore and soft rugs to lay on with a book. Lots of ideas for taking dramatic play outdoors in this blog post.
- Spaces for music and sound – think about making your own resources that include banging walls or trees, or musical spools.

Step 2 – Equipping the outdoor space on a budget.
Tips to keep those equipment costs down.
- Learn basic tool and maintenance skills.
- Collect ideas & inspiration for upcycling & DIV projects to save money buying new.
- Start with what you already have & modify.
- Consider sustainability issues of just throwing out older equip and plastic.
- Get creative!Use free or low cost materials like wooden pallets to turn into tables, seating, mud kitchens, dividers, garden beds and more!
- Turn household items into resources by thinking outside the box and getting creative!
- Use low cost open ended & recycled materials.
- Grow gardens from seed – save a seed library!
Where can you find budget friendly toys or materials to help you create DIY resources?
- Recycling & revolve centres.
- Garage sales, op shops, car boot markets.
- Toy libraries
- Educator swap days
- Garden/landscaping/hardware stores
- Discount & department stores (get inventive!)
- Treelopping & mulching services
- Industrial estates
- Tradespeople
- Local council
- Park, beach, bush visits.
- Postage & packaging materials (reuse)
- Cabinetmakers (wood offcuts & boards)
- Tyre shops – explore some different ways educators reuse tyres for play in this post.
Adding fixed or non fixed equipment to the natural outdoor play area is often a widely debated topic in early childhood circles at the moment but there are benefits to both and it really doesn't have to be one or the other – especially when you are on a budget and need to retain and reuse some of your older equipment. It really isn't sustainable practice to just get rid of everything you already have just because it is no longer deemed worthy for outdoor play areas!
I really do believe that balance is the key so first think about modifying, extending and upcycling what you already have! I've added some pros and cons for both fixed and non fixed equipment to help you think outside that box a little!
Fixed Equipment
- Can inadvertently limit creativity, movement, the urge to experiment & problem solve.
- Provides familiarity & stability to the space for children .
- They can add quick and easy to setup climbing, coordination & balance challenges.
- Can be natural materials or manufactured.
- Provides a base to extend upon with addition of open ended materials and resources.
- Can help you to define and break up spaces as suggested above. Work with what you already have and define spaces from there.
- Can offer secret, imaginary and quiet spaces with just a few setup tweaks and additional materials.
- They will require ongoing maintenance & safety checks.
- Can definitely be expensive to purchase & relocate.
Non-Fixed Equipment
- Allows children to be curious, creative & direct their own play.
- There are no rules or expectations to follow , no right or wrong way to use the materials.
- A budget friendly resource option for educators, centres & schools.
- Easy to source & extend on.
- Easy to store & change around regularly.
- Encourages creative thinking, problem solving.
- Supports children to experiment, investigate, problem solve and explore cause and effect.
- Allows children of all ages to move, carry, redesign, recreate & combine materials.
- Supports early years schemas.
- Can be of either natural or manufactured origin.
Think about how you are going to store your outdoor resources & equipment and also provide easy accessibility for the children.
Some strategies for you to consider..
- Avoid disorganisation & clutter
- Ensure selection of diverse range of materials.
- Label storage shelves, buckets, walls.
- Involve children in making labels -use drawings or photos.
- Set up to send message of ‘I can do things myself here'
- Organise for easy use, independence.
- Store like materials together -easy to find
- Keep loose parts easily accessible to move.
- Provide easy visual cues throughout space.
- Arrange materials to use space wisely.
- Mix of closed and open storage.
- Plan ahead on program to define resources needed.
- If possible leave some outdoor spaces ready to … ,. ‘play again' tomorrow to extend on interests.
For all of these ideas and a whole lot more why not download the Empowered Educator Outdoor Play Toolkit – A huge resource bundle of e-books, posters and printables to help you plan for outdoor learning!
Step 3 – Including Natural Elements
It doesn't need to be an expensive or complicated process to introduce and include natural elements in your outdoor play area. Could you start with 1 or 2 of the simple ideas below?
- Add access to natural items to extend everyday play experiences.
- Hang mobiles outside made from nature items.
- Create textured pathways – pebbles, shells etc
- Add logs, branches, bamboo, rocks, gravel throughout the space.
- Plant herb, vegetable & flower gardens wherever you have the space.
- Plant native trees to encourage local birds.
- Use real mud, real sand, real clay, real plants.
- Place baskets around the yard for collecting and go on scavenger hunts together for nature items.
- Show children how to make their own paints from sand, dirt, flowers.
- Use palm fronds to weave on fences.
- Use wooden stumps for seating & tables.
- Paint on wood, stones, logs, leaves, bark.
- Grow plants from seed – collect seedpods.
You don't need to try and add everything all at once when modifying your outdoor play areas…create one design element then work in steps from there. Children can play in the space as you continue around them so no need to try and wait until everything is ‘perfect'. They will love that big dirt pile!

Easy design ideas you might like to try.
Natural Shade Elements
Trees, leaves, branches, gardens offering respite from heat and sun.
Open Grassy Areas
To run, to be noisy, to play games, to roll, to lie, to chase, to sit, to gather.
Digging Patches
Space to build, to construct, to use real tools, to problem solve, to fill, to carry, to tip, to pour, to mix, to play.
Sand & Water Areas
Opportunities to get messy, explore with senses, role play, explore wise water use, compare wet and dry, cook and create, mix with other materials to extend play.
Natural Climbing Challenges
Trees, fallen logs, wooden tree stumps, stone steps, grassy mounds, boulders & rock piles, twig cubbies & forts provide challenges without the need for plastic fixed equipment
Gardens, Greenery, Natives
Plants, grasses & gardens can form those secret spaces, screen smaller areas, invite living creatures, provide food, develop responsibility, opportunities to explore cultures.
Mounds , Slopes, Tunnels, Tiers.
Uneven surfaces encourage children to challenge muscles, balance, coordination & creative thinking.
Fixed & Loose Natural Elements
Provide a choice of natural fixed materials as well as loose parts to encourage direction of own play, imagination, problem solving and discovery.
Sustainable Elements
Ponds, compost piles, vegetables, herbs, bug hotels, edible landscapes, waste systems worm farm, water conservation, recycled materials.
Simple Sensory Elements
Those that allow children to discover, experience, feel, touch, taste, see, hear and learn.
Outdoor Art
Sound gardens, murals, pathways, sculpture, display, gateways, sundials.
Step 4 – Planting for Child Friendly Outdoor Environments
Take the time to consider child safety and the type of gardens, plants, pots and space you will use in your outdoor play area. I've compiled some ideas and inspiration you might like to consider to help you with your design planning below..
- Experiment with a variety of plants.
- Keep in mind area you live/weather/seasons.
- Water wise planting. Mulches.
- Plants to grow quickly, harvest easily, and eat.
- Tough plants that will stand up to knocks & trampling
- Beans & peas to create tee pees & tunnels.
- Add plants to invite insects & garden creatures.
- Colourful flowers for craft, science & math games, display, painting with.
- Sunflowers to pick, save seeds, make walls.
- Palm fronds make excellent materials for building with or making mats.
- Large trees that offer shade and spaces to relax (Apple.Mulberry, Mango are good!)
- Tall grasses and clumping shrubs to create smaller spaces and hidden areas (Liriope).
- Smaller sensory plants like mossy grass, furry succulents, mondo grass (good for fairy gardens!)
For additional reference you can download an excellent and comprehensive poisonous plants factsheet from Kidsafe here and also from the Sydney Children's Hospital Network
I hope this helps you to begin thinking about how you can use simple design, natural materials and budget friendly resources to begin taking action to create that outdoor play area you really want.
In Part 3 of this series I’ll be sharing some strategies and ideas to help you overcome some of those common outdoor play challenges like shared spaces, small spaces, baby/toddler areas and a whole lot more that will leave you with no more excuses but excited to take action!
A Little About Me

Jodie Clarke is an early childhood professional supporting educators who want and need to stay passionate about the work they do! She has 30 years hands-on experience in the early childhood and human services sectors across many different roles.
Jodie is mum to 3 in Australia and has already helped thousands of educators with their work through her popular blog posts, activity ideas, online training and e-books.
I’d love to use some of your photos in a book I’m writing! Could we chat about this possibility?